Getform endpoint setup
Getform is a form backend platform that lets you handle your forms on your websites and apps. We assume in this article that you already know how to prepare your spreadsheet to send data with Appizy. In case you have any doubt, take a look at this example for a detailed approach.
1. Create a new endpoint
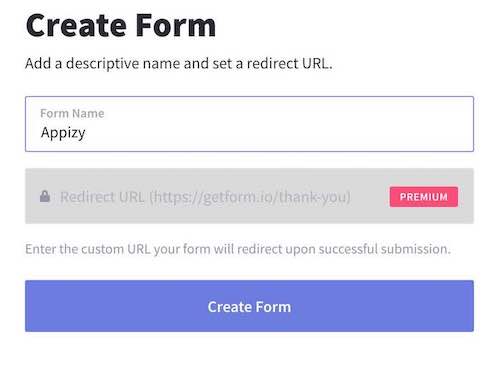
Once logged into your Getform account, click on the first card with a “+” sign, on Getform’ main dashboard to create a new form. Give your endpoint a name. Getform provides a standard Thank you page after form submission. You can customize it with any of the paid plans provided on the platform.

2. Copy the URL
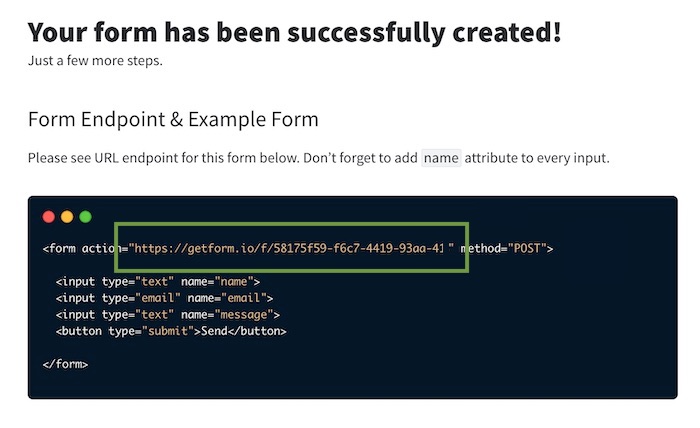
Once the setup is done, you should get an example of an HTML form containing the required form endpoint URL. Copy it and go to Appizy.

3. Paste and convert
Go to Appizy, and upload your spreadsheet. You can also start from the Quotation sample.
Use the following settings:
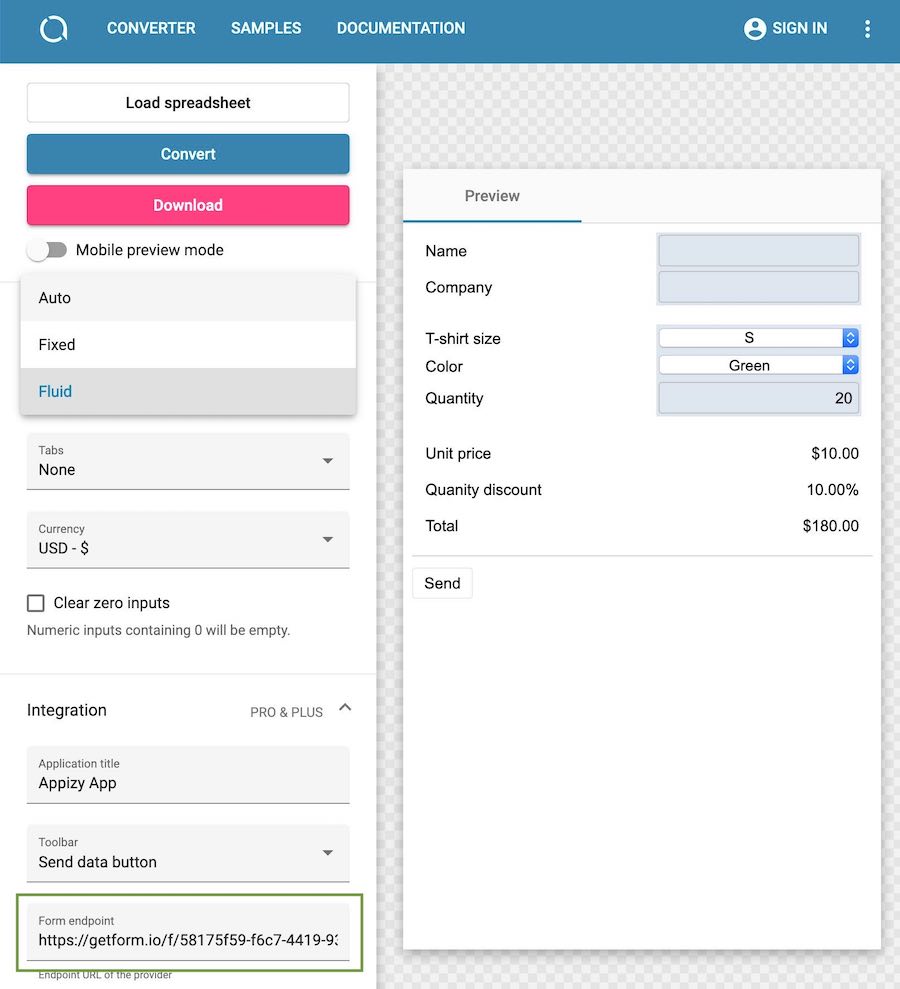
Integration > Toolbar > Send data button (requires PRO or PLUS). This will add a Send button below our form. When the end-user clicks on it, the form is submitted and we get the information contained in it.
Integration > Form endpoint. This is where we paste the URL provided by Getform after we created a new form in their interface.

4. Advanced usages
Getform integrates with Zapier out of the box (even on the free plan). You can connect your Getform forms to hundreds of other applications to speed up your workflow.
Getform lets you export the data collected to CSV to work with it easily on your laptop. All the data passed to Getform is spam protected by Getform’s built-in spam protection. You can integrate Google reCaptcha optionally if you would like to add an extra layer of protection.
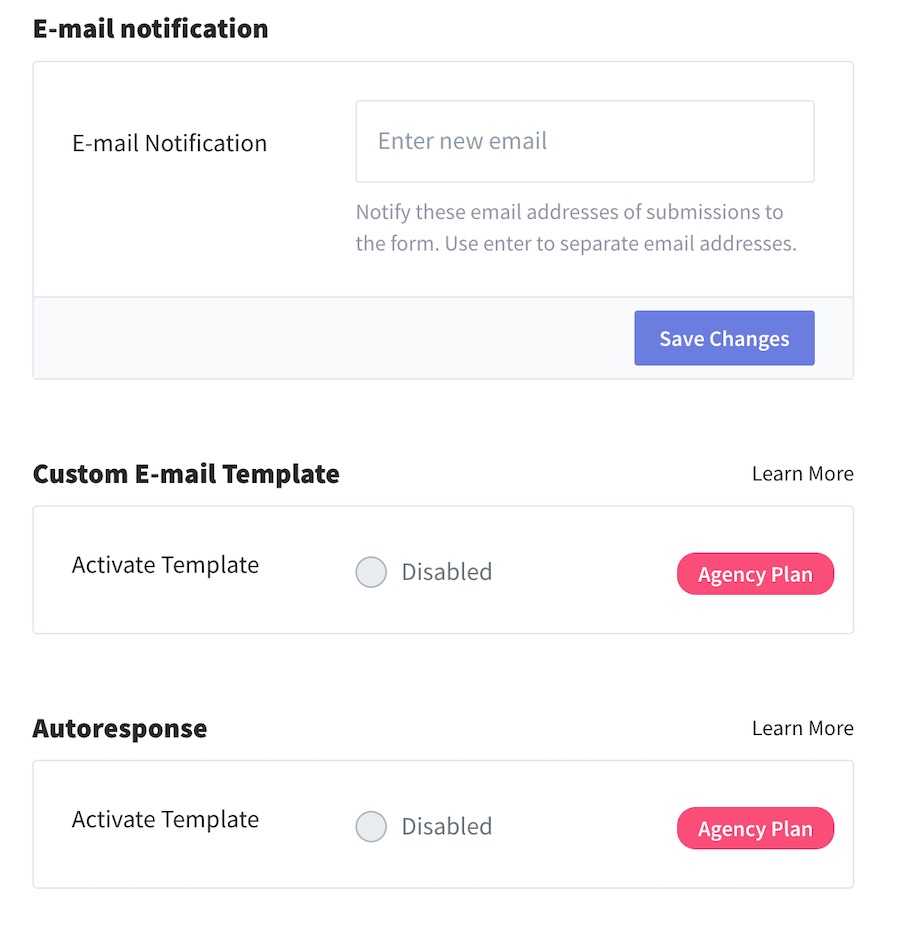
Finally, a great feature is the ability to send an auto-response email to the visitor who just submitted the form. A nice way to increase trust in your website by reducing the first contact time (and avoid duplicate submission).
